The Problem: You’re Not Using the VPN
You connect to a VPN. Check the IP, it changed. You think you’re protected.
But open a browser and visit whatismyipaddress.com. It shows your real ISP IP, not the VPN IP. Half your traffic is bypassing the tunnel. You’re thinking you’re private but you’re not.
This isn’t a bug in the VPN software. It’s how routing works and you didn’t understand the default behavior.
How VPN Routing Works
When you connect to a VPN, your system gets:
- A new virtual interface (tun0 usually)
- A private IP address inside the VPN network (like 10.8.0.5)
- A routing table entry that says “send traffic via tun0”
But “send traffic via tun0” doesn’t mean “send everything”. It means “send traffic matching this rule via tun0”.
Check Your Routing Table
# See what traffic goes where:ip route show
# Output looks like:# default via 192.168.1.1 dev eth0 proto dhcp metric 100# 10.8.0.0/24 dev tun0 proto kernel scope link src 10.8.0.5# 169.254.0.0/16 dev eth0 scope link metric 256
What this means:
default via 192.168.1.1= everything else goes to your ISP router10.8.0.0/24 dev tun0= only traffic to the VPN subnet goes through tun0
That’s the problem. Only traffic to the 10.8.0.0/24 range uses the VPN. Everything else (like visiting a website) goes directly to your ISP.
The Default VPN Connection Is Useless
Most VPN client software connects but doesn’t change routing. You get:
- A tunnel interface (tun0)
- An IP inside the VPN network
- Routes for that subnet only
- Everything else: still going through your ISP
You’re connected to a VPN, but not using it.
Fix It: Force All Traffic Through the VPN
You need a routing rule that says “everything goes through tun0 except for reaching the VPN server itself” (otherwise the VPN packets can’t reach the server):
# First, see your current default route:ip route show | grep default# default via 192.168.1.1 dev eth0
# Pin a host route to the VPN server via your real gateway,# so the encrypted tunnel packets can still reach it:sudo ip route add VPN_SERVER_IP via 192.168.1.1 dev eth0
# Now send everything else through the tunnel:sudo ip route add default dev tun0 metric 50
# Verify:ip route show
Skip that host-route step and you’ll deadlock yourself: the tunnel’s own packets get routed into the tunnel, which isn’t up yet, and the whole thing falls over. This is exactly the chicken-and-egg the OpenVPN/WireGuard configs below handle for you automatically.
Now check your IP:
curl icanhazip.com# Should show VPN IP, not your ISP IPThe Cleaner Way: Update VPN Config
Instead of manually messing with routing, configure the VPN client properly.
OpenVPN
In /etc/openvpn/client.conf:
clientremote vpn.example.com 1194proto udpdev tunca ca.crtcert client.crtkey client.key
# IMPORTANT: Route all traffic through VPN:redirect-gateway def1
That redirect-gateway def1 line makes OpenVPN automatically set routing to send everything through the tunnel. The def1 flag tells OpenVPN to add two 0.0.0.0/1 and 128.0.0.0/1 routes instead of touching the real default route, they win on longest-prefix match and leave your original gateway intact, so the tunnel can still reach the server. That’s why it’s the safer choice.
WireGuard
In /etc/wireguard/wg0.conf:
[Interface]Address = 10.0.0.2/32DNS = 1.1.1.1PrivateKey = [your key]
# Route ALL traffic (0.0.0.0/0) through the tunnel:[Peer]PublicKey = [server key]AllowedIPs = 0.0.0.0/0Endpoint = vpn.example.com:51820
That AllowedIPs = 0.0.0.0/0 is critical. It means “send all IPv4 traffic through this peer”.
Bring it up:
sudo wg-quick up wg0WireGuard automatically fixes routing for you.
Watch the Routing Change
# Before VPN:ip route show | grep default# default via 192.168.1.1 dev eth0
# After VPN (with correct config):ip route show | grep default# default dev tun0
# Verify the traffic:ip route get 8.8.8.8# 8.8.8.8 via 10.8.0.1 dev tun0 src 10.8.0.5
Now all traffic, including DNS queries, goes through tun0.
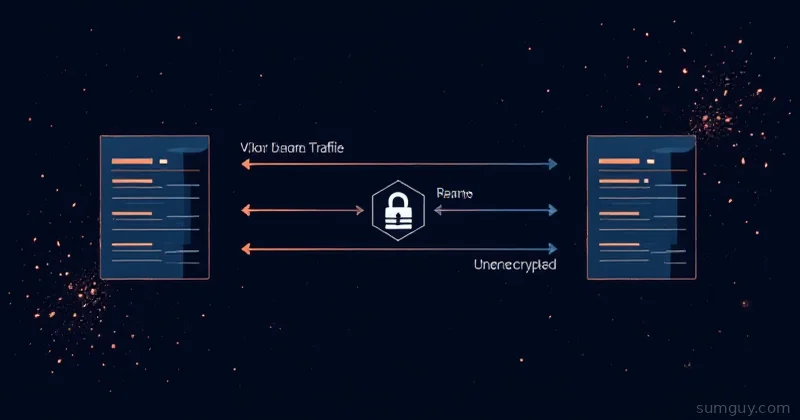
The DNS Leak (Related Problem)
Even if you route all traffic through the VPN, your DNS queries might still go to your ISP:
# Check what nameserver you're using:cat /etc/resolv.conf
# If you see:# nameserver 192.168.1.1# You're using your ISP's DNS, leaking what you're visiting!
Fix it by updating the VPN config to include DNS servers:
OpenVPN
# In client.conf:dhcp-option DNS 1.1.1.1dhcp-option DNS 1.0.0.1WireGuard
[Interface]Address = 10.0.0.2/32DNS = 1.1.1.1, 1.0.0.1Or manually update /etc/resolv.conf:
sudo tee /etc/resolv.conf << EOFnameserver 1.1.1.1nameserver 1.0.0.1EOFThen verify DNS traffic goes through the VPN:
# Before fix:dig google.com# ;; SERVER: 192.168.1.1#53
# After fix:dig google.com# ;; SERVER: 10.8.0.1#53  (VPN's DNS server)
Real Test: Prove You’re Using the VPN
# Check IP:curl icanhazip.com# Should show VPN IP
# Check IP via traceroute:traceroute -m 5 google.com# First hop should be inside the VPN network (10.x.x.x)
# Check DNS is going through VPN:dig google.com +short# Should show VPN DNS server in output
# tcpdump to verify traffic leaving locally:sudo tcpdump -i eth0 -q# Should be mostly empty (VPN encapsulates everything)
If any of those show your ISP IP or routes, you’re still leaking.
Common Mistakes
-
Connected to VPN but forgot
redirect-gateway: Only VPN subnet traffic is routed. Everything else bypasses VPN. -
Manual routing without DNS changes: Traffic goes through VPN but DNS queries don’t, so your ISP sees every site you visit.
-
Split tunneling enabled: VPN config has exceptions like
route 192.168.0.0/16 192.168.1.1(route home network directly). That traffic bypasses the VPN.
Check your config for route or table entries that bypass the tunnel.
- IPv6 leaking: You disabled IPv4 VPN but your system still has IPv6. It uses IPv6 directly to the ISP. Fix with:
sudo sysctl -w net.ipv6.conf.all.disable_ipv6=1Quick Checklist
# 1. VPN connected?ip addr show | grep tun0
# 2. All traffic routed through VPN?ip route show | grep default# Should show "dev tun0", not a gateway IP
# 3. DNS using VPN?dig google.com +short# SERVER should be VPN's IP
# 4. IP address changed?curl icanhazip.com# Should show VPN IP, not ISP IP
# 5. No IPv6 leak?curl -6 icanhazip.com# Should fail or show VPN IPv6
If all five pass, you’re actually using the VPN properly. If any fail, you’re leaking traffic.
Most people think they’re protected by a VPN but they’re really not, because they never fixed the routing. Spend 5 minutes getting this right and you’re actually private.