The Dream vs. 3 AM Reality
You’ve seen the Proxmox forums. Someone posts their 3-node cluster with Ceph underneath, live-migrating VMs between nodes like it’s nothing, zero downtime, storage HA that actually works. You want that. Who wouldn’t?
Then you spend a Saturday reading the Ceph docs and hit the requirements list. 10GbE recommended between nodes. Dedicated SSDs for journals and WAL. At least 1 GB of RAM per TB of raw OSD capacity. Three MON daemons minimum for quorum. And that’s before you’ve written a single byte of production data.
Then it’s 3 AM and your OSD is flapping. HEALTH_WARN 1 osds down. The Ceph dashboard is showing slow ops on 47 operations. Your cluster is technically “degraded” (not dead, just miserable), and you’re learning what “backfilling” means in real time.
This is Ceph. It pays off, but only under specific conditions. Let’s talk about when those conditions exist in a home lab and when you should just run NFS and go to bed.
What Ceph Actually Requires
Before you bootstrap anything, here’s what a functional 3-node Ceph cluster actually needs, not what you can technically scrape by with:
Network: 10GbE between every node. Not “10GbE would be nice.” Not “1GbE works for most things.” A single 1GbE link will saturate during replication and OSD recovery, and you’ll spend your time chasing timeouts instead of running workloads. If you only have 1GbE, budget $40 for a used 10GbE switch and some SFP+ cards before touching Ceph.
RAM: The 1 GB per TB rule is real. 12 TB of raw OSD capacity means 12 GB of RAM just for OSDs, plus overhead for MONs, MGRs, and the OS. On a 3-node cluster where each node has 6 to 8 disks, this adds up fast. 32 GB per node is a comfortable floor.
Storage layout: Each OSD needs a block device. Ideally, fast NVMe for the WAL/DB and spinning disks (or slower NVMe) for the data. Mixing everything on a single pool of drives works but degrades performance significantly. Dedicated DB/WAL devices are not optional if you care about write latency.
CPU: Not the bottleneck most of the time, but BlueStore and encryption add overhead. Anything from the last 5 years with 4+ cores per node is fine.
Patience: Ceph is enterprise software with enterprise-grade complexity. The learning curve is real. You will read error messages you don’t understand. You will run ceph -s constantly. You will learn to love ceph osd tree.
When 3-Node Ceph Actually Wins
Ceph isn’t for everyone, but there are specific use cases where it’s genuinely the right answer even in a home lab.
Live VM Migration Across Proxmox Hosts
If you’re running Proxmox on your 3 nodes and you want to live-migrate VMs between hosts without shared NFS or iSCSI, Ceph RBD is the cleanest solution available. With RBD as your storage backend in Proxmox, VMs run from a replicated block device that any node can attach to. Live migration becomes a scheduling decision, not a storage operation.
NFS can technically do this but adds single-point-of-failure problems. iSCSI on a home lab is more hassle than it’s worth. Ceph with RBD is the professional answer here.
Kubernetes Persistent Volumes with Real HA
If you’re running k3s or full Kubernetes on your 3 nodes and you need ReadWriteOnce persistent volumes that survive node failures, RBD provisioned via Rook-Ceph is the answer. It integrates cleanly with the CSI driver, handles dynamic provisioning, and if one node dies your PVCs are still accessible from surviving nodes.
This is genuinely hard to replicate with other solutions. SeaweedFS has a CSI driver but it’s younger and less battle-tested. Longhorn is excellent for single-node recovery but isn’t Ceph-grade for multi-site. If you want enterprise Kubernetes storage semantics on a home lab budget, Ceph gets you there.
The Node-Goes-Down-for-a-Weekend Test
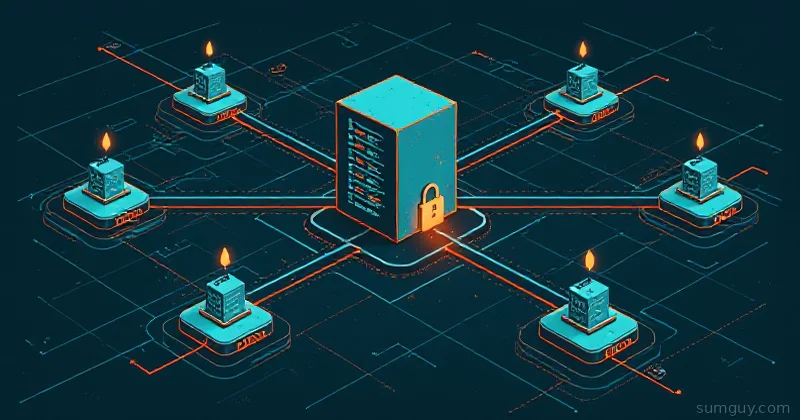
Real HA means pulling power from one node and watching your workloads keep running. With 3-node Ceph at replica 3, when one node goes offline you lose one replica but the remaining two nodes have full copies of everything. Your cluster enters degraded state, backfilling starts, and your VMs and services keep running.
This is the scenario NFS fails completely. It’s the scenario where “I’ll just use RAID on each node” falls apart. If uptime-when-one-box-is-offline is a real requirement (not a nice-to-have), Ceph is one of the very few solutions that actually delivers it at home lab scale.
When Ceph Is the Wrong Answer
You have mismatched drives. 3x 4TB spinning disks from three different manufacturers, two different generations of firmware. Ceph will work but performance will be unpredictable and rebalancing operations will drag the slow drives across your entire cluster.
You only have 1GbE. Replication, recovery, and client I/O all share that pipe. You’ll hit saturation during OSD recovery and the cluster will mark operations as slow, which cascades into OSD flapping, which cascades into you having a bad time.
Your workload is just file sharing. NFS or SMB on a dedicated box, maybe with a simple DRBD replica if you want redundancy, is faster to set up, easier to maintain, and perfectly adequate for serving media files to Jellyfin or documents to Nextcloud.
You have less than 3 nodes. 2 nodes can’t form MON quorum without adding an arbiter. 1 node is just local storage with extra steps. Ceph requires a minimum of 3 nodes.
Installing Ceph with cephadm
Assuming you’ve decided Ceph makes sense, here’s the actual install. cephadm is the current blessed bootstrapping tool. It handles container deployment so you’re not manually managing Ceph daemons.
Prerequisites on All Nodes
# All nodes: install Python 3, systemd, podman or dockerapt install -y python3 podman
# Set hostnames so they're addressable by namehostnamectl set-hostname ceph-node1  # run on each node with appropriate name
# Add all nodes to /etc/hosts on each nodeecho "10.0.0.11 ceph-node1" >> /etc/hostsecho "10.0.0.12 ceph-node2" >> /etc/hostsecho "10.0.0.13 ceph-node3" >> /etc/hosts
Bootstrap the First Monitor
Run this on ceph-node1:
# Download cephadm (Squid is the current stable release)curl --silent --remote-name --location https://download.ceph.com/rpm-squid/el9/noarch/cephadmchmod +x cephadm./cephadm add-repo --release squid./cephadm install
# Bootstrap on your first node, using its 10GbE IPcephadm bootstrap \  --mon-ip 10.0.0.11 \  --cluster-network 10.0.0.0/24 \  --initial-dashboard-user admin \  --initial-dashboard-password changeme_please
This pulls containers, creates the first MON and MGR, generates keyring, and drops a ceph.conf in /etc/ceph/. The dashboard comes up at https://ceph-node1:8443.
Add the Other Nodes
# Copy SSH key from bootstrap node to othersssh-copy-id -i /etc/ceph/ceph.pub root@ceph-node2ssh-copy-id -i /etc/ceph/ceph.pub root@ceph-node3
# Add hosts to the clusterceph orch host add ceph-node2 10.0.0.12ceph orch host add ceph-node3 10.0.0.13
# Verify all hosts are visibleceph orch host ls
Deploy MONs and MGRs
# You want exactly 3 MONs for quorumceph orch apply mon 3
# 2 MGRs is fine for a 3-node clusterceph orch apply mgr 2
# Watch daemons come upceph orch ps
Add OSDs
This is where you tell Ceph which drives to consume. Be deliberate, this is irreversible without wiping the drives.
# Check what cephadm can seeceph orch device ls
# Deploy OSDs on all available devices across all hosts# WARNING: this consumes all unformatted drivesceph orch apply osd --all-available-devices
# Or be explicit about which drives on which hostsceph orch daemon add osd ceph-node1:/dev/sdbceph orch daemon add osd ceph-node1:/dev/sdcceph orch daemon add osd ceph-node2:/dev/sdb# ... and so on
After OSDs come up, verify the cluster is healthy:
ceph -sceph osd treeceph dfPool Configuration: Replica 3 vs Erasure Coded
For a 3-node home lab, replica 3 wins. Here’s why:
Erasure coding with a 2+1 profile actually gives you better raw capacity efficiency than replica 3. You store 1.5x the data instead of 3x, so you get roughly 2x more usable space from the same hardware. The problem is EC pools have significant write overhead, don’t support RBD natively, and require more CPU. The space efficiency gains show up at scale (10+ nodes, large object storage workloads) where the extra complexity pays off.
At 3 nodes, use replica 3 pools. Simple, fast, and when one node dies you still have two full copies.
# Create a replicated poolceph osd pool create vm-data replicated
# Set replica size to 3 (default, but be explicit)ceph osd pool set vm-data size 3ceph osd pool set vm-data min_size 2
# Enable RBD application on the poolceph osd pool application enable vm-data rbd
# Initialize the poolrbd pool init vm-data
The min_size 2 setting means your cluster can still write with one OSD down. If you set min_size 3, writes will block completely the moment any OSD goes offline. For home lab HA, min_size 2 is the right call.
CephFS vs RBD vs RGW Pick Your Interface
RBD (RADOS Block Device): Block storage. One client at a time (ReadWriteOnce). Perfect for VM disks and Kubernetes PVCs. Best performance. Use this for Proxmox VM storage.
CephFS: Distributed filesystem. Multiple clients, ReadWriteMany semantics. Use this if you want to replace NFS with something that survives node failures. You can mount it via the kernel driver or FUSE. Works well for shared data between containers or VMs.
# Create CephFSceph fs volume create homelab-fs
# Mount via kernel driver on a clientmount -t ceph ceph-node1:/ /mnt/cephfs \  -o name=admin,secret=$(ceph auth get-key client.admin)
RGW (RADOS Gateway): S3-compatible object storage. Use this if you want to run your own S3 endpoint for backups (Restic, Rclone, Duplicati all speak S3). Adds overhead and complexity, so don’t deploy it unless you specifically need S3 semantics.
For most home labs: start with RBD for VM storage, add CephFS if you need shared filesystems. Skip RGW unless you have a specific S3 use case.
Common Failure Modes (and What They Actually Mean)
HEALTH_WARN slow ops
ceph health detail# HEALTH_WARN 47 slow ops, oldest one blocked for 32 sec, daemons [osd.0,osd.2] have slow opsThis usually means network saturation, OSD disk I/O bottleneck, or rebalancing under load. Check your network utilization first. If you’re on 1GbE and running a recovery simultaneously with client I/O, this is expected and miserable.
# Check OSD performanceceph osd perf
# Check if backfilling is in progressceph -s | grep backfill
Full Ratio Panic
Ceph stops accepting writes at 85% full by default. At 95% it panics hard. You will hit this before you expect to.
# Check current ratiosceph df
# Adjust temporarily while you add capacity (not a long-term fix)ceph osd set-full-ratio 0.87ceph osd set-backfillfull-ratio 0.82
OSD Flapping
An OSD repeatedly going up and down is almost always a network issue (packet loss, MTU mismatch) or a dying drive. Check dmesg on the relevant node and smartctl -a /dev/sdX on the suspect drive.
# Check OSD journal for errorsceph log last 50 | grep osd.2
# Check disk healthsmartctl -a /dev/sdb
The Power-Loss Test (Do This Before Production)
Before you put anything real on this cluster, yank power from one node. Literally. Or use your hypervisor to hard-stop a VM if your nodes are nested.
What you want to see:
ceph -s# Should show: HEALTH_WARN# Should show: 1/3 mons down, quorum 0,2 (ceph-node1, ceph-node3)# Should show: x osds down# Should NOT show: HEALTH_ERR or cluster write haltWait 2 to 5 minutes for the cluster to stabilize. Your replicated data should remain accessible from the surviving nodes. VMs on the surviving hosts should keep running. Kubernetes pods should reschedule.
If the cluster enters HEALTH_ERR and stops serving I/O, you have a configuration problem: possibly min_size set wrong, or you don’t actually have proper replica distribution across failure domains.
Power the node back on. Watch it rejoin:
# Watch OSDs come backceph -w
# Verify full health restoredceph -s
Run this test. It will save you from discovering the problems at 2 AM on a Tuesday when you actually care.
The Bottom Line
Most home labs don’t need Ceph. If you’re running a couple of VMs on a single Proxmox node with local storage and NFS for shared files, you’re fine. Ceph would be spending 40 hours of setup and ongoing ops overhead to solve a problem you don’t have.
But if you’ve got 3 nodes, 10GbE networking, and a real requirement (live VM migration, Kubernetes HA, genuine survive-a-node-failure-for-a-weekend storage), Ceph is the answer. Not because it’s the easiest, but because nothing else at home lab scale actually delivers those guarantees.
The learning curve is steep. The RAM requirements are real. The 3 AM OSD flapping is almost a rite of passage. But once it’s running and you watch a Proxmox VM migrate between hosts while the storage stays up, or you pull power from a node and nothing stops: you’ll understand exactly why people run this in their basements.
Your future self dealing with ceph osd tree at midnight will appreciate having set the min_size 2 correctly. Your present self should probably test that power-loss scenario before it happens naturally.