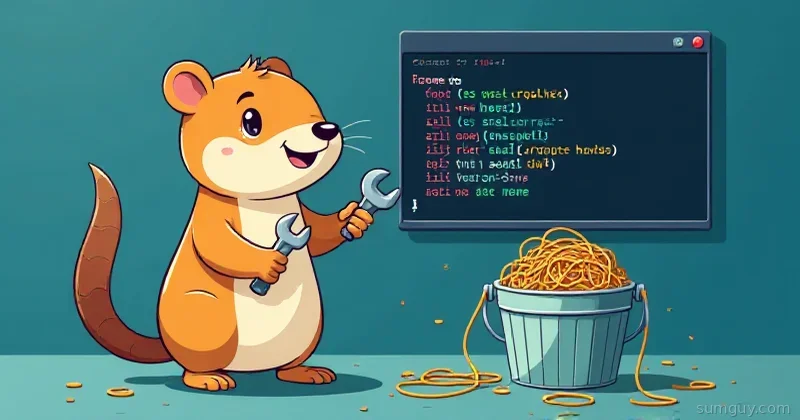
Shell Scripts Are Great Right Up Until They’re Not
Every shell script has a natural life. It starts as five lines. It works. Someone asks you to add a flag. You add it with some getopts wizardry. Someone asks for a subcommand. You add a case statement. Three months later you have 600 lines of bash, three levels of nested conditionals, and you’ve started adding set -e and trap and honestly you’re just writing a programming language at this point.
Go for CLI tools is the answer to this. Single binary. Zero runtime dependencies. Ships on Linux, macOS, and Windows from one codebase. Starts in milliseconds. Has a type system. Has proper error handling. Has the best concurrency model for doing multiple things in parallel.
Let’s build a real CLI.
Why Go Specifically
Other languages produce CLI tools too. Here’s why Go’s trade-offs make it particularly good for this:
- Single static binary:
go buildproduces a self-contained binary. Copy it anywhere, run it. No Python virtualenvs, no Node modules, no JVM to install. - Fast startup: Go binaries start in single-digit milliseconds. Python scripts can take 100-300ms just importing modules.
- Great standard library:
os,io,net/http,encoding/json,flag, useful stuff is built in, no package hunting required. - Cross-compilation:
GOOS=windows GOARCH=amd64 go buildfrom your Linux machine and you have a Windows binary. It just works. - Goreleaser: The Go ecosystem has excellent tooling for packaging and distributing binaries.
Project Structure
For a non-trivial CLI:
mycli/├── cmd/│ ├── root.go # Root command + global flags│ ├── version.go # version subcommand│ └── deploy.go # deploy subcommand├── internal/│ └── config/│ └── config.go├── main.go├── go.mod└── goreleaser.yamlmain.go stays thin:
package main
import "github.com/yourname/mycli/cmd"
func main() {    cmd.Execute()}
Cobra for Subcommands
Cobra is the standard for Go CLIs with subcommands (kubectl, gh, docker all use it):
go mod init github.com/yourname/mycligo get github.com/spf13/cobra@latestcmd/root.go:
package cmd
import (    "fmt"    "os"    "github.com/spf13/cobra")
var rootCmd = &cobra.Command{    Use:   "mycli",    Short: "My CLI tool",    Long:  `A longer description of your CLI tool and what it does.`,}
func Execute() {    if err := rootCmd.Execute(); err != nil {        fmt.Fprintln(os.Stderr, err)        os.Exit(1)    }}
func init() {    // Global flags go here    rootCmd.PersistentFlags().BoolP("verbose", "v", false, "Enable verbose output")}
Add a subcommand in cmd/deploy.go:
package cmd
import (    "fmt"    "github.com/spf13/cobra")
var deployCmd = &cobra.Command{    Use:   "deploy [environment]",    Short: "Deploy to an environment",    Args:  cobra.ExactArgs(1),    RunE: func(cmd *cobra.Command, args []string) error {        env := args[0]        dry, _ := cmd.Flags().GetBool("dry-run")
        if dry {            fmt.Printf("Dry run: would deploy to %s\n", env)            return nil        }
        return deployToEnvironment(env)    },}
func init() {    rootCmd.AddCommand(deployCmd)    deployCmd.Flags().Bool("dry-run", false, "Simulate deployment without making changes")}
func deployToEnvironment(env string) error {    fmt.Printf("Deploying to %s...\n", env)    // Your logic here    return nil}
Now mycli deploy production and mycli deploy staging --dry-run just work, with automatic help generation.
Viper for Config Files
Viper handles config files, environment variables, and defaults, all in one:
go get github.com/spf13/viper@latestpackage config
import ( "github.com/spf13/viper")
type Config struct { APIEndpoint string `mapstructure:"api_endpoint"` Timeout int `mapstructure:"timeout"` Debug bool `mapstructure:"debug"`}
func Load() (*Config, error) { viper.SetConfigName("config") // config.yaml or config.json viper.SetConfigType("yaml") viper.AddConfigPath("$HOME/.mycli") // ~/.mycli/config.yaml viper.AddConfigPath(".") // or ./config.yaml
// Default values viper.SetDefault("timeout", 30) viper.SetDefault("api_endpoint", "https://api.example.com")
// Allow env var overrides: MYCLI_DEBUG=true viper.SetEnvPrefix("MYCLI") viper.AutomaticEnv()
if err := viper.ReadInConfig(); err != nil { if _, ok := err.(viper.ConfigFileNotFoundError); !ok { return nil, err } // Config file not found is fine — we have defaults }
var cfg Config if err := viper.Unmarshal(&cfg); err != nil { return nil, err }
return &cfg, nil}Config file ~/.mycli/config.yaml:
api_endpoint: https://api.yourdomain.comtimeout: 60debug: falseAdding Colors and Progress
Terminal UX matters. lipgloss is the modern choice:
go get github.com/charmbracelet/lipgloss@latestgo get github.com/charmbracelet/bubbletea@latestFor simpler needs, color is lighter:
import "github.com/fatih/color"
color.Green("✓ Deployment successful")color.Red("✗ Error: %v", err)color.Yellow("⚠ Warning: environment is staging")
// Progress indicationfmt.Print("Deploying")for i := 0; i < 3; i++ {    time.Sleep(500 * time.Millisecond)    fmt.Print(".")}fmt.Println(" done")
For real progress bars, progressbar:
bar := progressbar.Default(100)for i := 0; i < 100; i++ { bar.Add(1) time.Sleep(10 * time.Millisecond)}Reading Stdin and Writing Stdout Properly
CLIs should compose with pipes. Don’t print decorative output when stdout is piped to another program:
import (    "os"    "golang.org/x/term")
// Check if we're in an interactive terminalfunc isInteractive() bool {    return term.IsTerminal(int(os.Stdout.Fd()))}
// Only print spinner/colors when interactiveif isInteractive() {    fmt.Print("Processing...")}
Read from stdin when no file argument is given (Unix pipeline convention):
func getInput(cmd *cobra.Command, args []string) (io.Reader, error) { if len(args) > 0 { return os.Open(args[0]) } // Check if stdin has data stat, _ := os.Stdin.Stat() if (stat.Mode() & os.ModeCharDevice) == 0 { return os.Stdin, nil } return nil, fmt.Errorf("no input: provide a file or pipe data via stdin")}Cross-Compilation
From Linux, build for multiple targets:
# Build for all platformsGOOS=linux GOARCH=amd64 go build -o dist/mycli-linux-amd64 .GOOS=linux GOARCH=arm64 go build -o dist/mycli-linux-arm64 .GOOS=darwin GOARCH=amd64 go build -o dist/mycli-darwin-amd64 .GOOS=darwin GOARCH=arm64 go build -o dist/mycli-darwin-arm64 .GOOS=windows GOARCH=amd64 go build -o dist/mycli-windows-amd64.exe .Add build flags for smaller binaries:
go build -ldflags="-s -w" -o mycli .# -s: strip symbol table# -w: strip DWARF info# Reduces binary size by ~30%Goreleaser for Proper Distribution
Goreleaser automates the entire release pipeline, cross-compile, checksum, GitHub release, Homebrew tap, apt repo:
go install github.com/goreleaser/goreleaser/v2@latestgoreleaser init # Creates .goreleaser.yaml.goreleaser.yaml:
builds:  - env:      - CGO_ENABLED=0    goos:      - linux      - darwin      - windows    goarch:      - amd64      - arm64    ldflags:      - -s -w -X main.version={{.Version}}
archives:  - formats: [tar.gz]    format_overrides:      - goos: windows        formats: [zip]
checksum:  name_template: "checksums.txt"
brews:  - repository:      owner: yourname      name: homebrew-tap    homepage: https://github.com/yourname/mycli    description: My CLI tool
release:  github:    owner: yourname    name: mycli
Tag and release:
git tag v1.0.0git push origin v1.0.0goreleaser release --cleanGoreleaser builds all targets, creates the GitHub release with downloadable binaries, updates your Homebrew tap, and generates checksums. All from one command. This is genuinely impressive compared to the shell script you used to maintain for this.
Shell scripts are great. Build processes, automation, one-liners, shell is perfect. But when your tool needs to be distributed to other machines, needs subcommands, needs config files, or needs to be maintained by someone other than you: write it in Go. You’ll thank yourself at the 400-line mark.