2026-05-07 update, don’t follow this guide for new deployments. MinIO archived its open-source community edition on April 25, 2026. The GitHub repo is read-only, the admin console was removed back in May 2025, and there are no more security patches. This post is preserved for historical context only.
If you want self-hosted S3-compatible storage today, deploy Garage instead. See MinIO Is Archived: Move to Garage for the timeline, the comparison, and a working Garage + Nextcloud setup.
Nextcloud on Local Storage Is Fine Until It Isn’t
Most people run Nextcloud with files stored on a local volume. It works. It’s simple. And then you want to add a second machine, or move the data to a different disk, or add redundancy, and suddenly you’re staring at rsync jobs and hoping nothing goes wrong during the transfer.
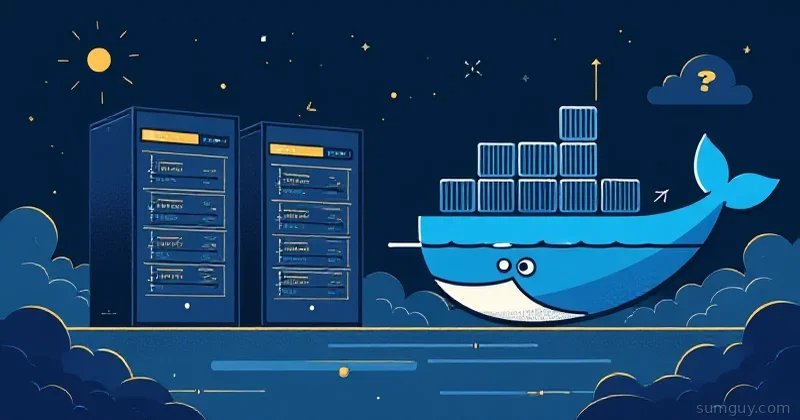
MinIO is the answer. It’s a self-hosted object storage server that speaks Amazon’s S3 API natively. Nextcloud can use S3-compatible storage as its primary data backend, meaning instead of files living on a local filesystem, they live in MinIO buckets. You get the flexibility of object storage with zero dependency on AWS.
Why MinIO as a Nextcloud Backend
A few reasons this architecture makes sense:
- Separation of concerns: your Nextcloud application container and your data storage are decoupled. Move, upgrade, or replace either independently.
- S3 API compatibility: MinIO is a drop-in S3 replacement. Tools that work with AWS S3 (rclone, boto3, AWS CLI) work with MinIO.
- Horizontal scaling: add more MinIO nodes when you outgrow a single machine (MinIO supports erasure coding and distributed mode)
- Dedicated backup target: it’s easier to back up a MinIO bucket than a Nextcloud data directory
- Encryption at rest: MinIO supports transparent SSE-S3 encryption
Deploying MinIO
Single-node MinIO is a single Docker container:
version: "3.8"services: minio: image: minio/minio:latest container_name: minio restart: unless-stopped command: server /data --console-address ":9001" environment: MINIO_ROOT_USER: minioadmin MINIO_ROOT_PASSWORD: changeme_use_strong_password volumes: - /data/minio:/data ports: - "9000:9000" # S3 API - "9001:9001" # Web console healthcheck: test: ["CMD", "curl", "-f", "http://localhost:9000/minio/health/live"] interval: 30s timeout: 10s retries: 3docker compose up -dVisit http://your-server:9001 for the MinIO console. Log in with your root credentials.
Important: MinIO’s root user is like AWS root, don’t use it for application credentials. We’ll create a dedicated service account next.
Creating Buckets and User Policies
Create a bucket
Via the web console, click “Create Bucket.” Name it something like nextcloud-data. Versioning is optional, it’s useful for recovery but adds storage overhead.
Or via the CLI:
# Install mc (MinIO Client)docker run -it --rm --entrypoint="" minio/mc:latest mc alias set myminio http://your-server:9000 minioadmin yourpassword
# Create bucketdocker run -it --rm minio/mc:latest mc mb myminio/nextcloud-data
Create a dedicated service user
In the MinIO console, go to Identity → Users → Create User. Call it nextcloud-service. Generate or set a strong password.
Create a policy that grants access to only the Nextcloud bucket:
{ "Version": "2012-10-17", "Statement": [ { "Effect": "Allow", "Action": [ "s3:GetBucketLocation", "s3:ListBucket", "s3:ListBucketMultipartUploads" ], "Resource": ["arn:aws:s3:::nextcloud-data"] }, { "Effect": "Allow", "Action": [ "s3:PutObject", "s3:GetObject", "s3:DeleteObject", "s3:ListMultipartUploadParts", "s3:AbortMultipartUpload" ], "Resource": ["arn:aws:s3:::nextcloud-data/*"] } ]}Assign this policy to the nextcloud-service user. Now Nextcloud has bucket access but can’t touch anything else in MinIO.
Configuring Nextcloud with S3 Backend
You have two options: use MinIO as primary storage (all files go to MinIO from the start) or as external storage (an additional mount alongside local storage). Primary is better for new installations; external is easier to add to existing setups.
Primary storage (recommended for new installs)
Add to your Nextcloud config.php:
'objectstore' => [ 'class' => '\\OC\\Files\\ObjectStore\\S3', 'arguments' => [ 'bucket' => 'nextcloud-data', 'autocreate' => true, 'key' => 'nextcloud-service', 'secret' => 'your-service-user-password', 'hostname' => 'minio.yourdomain.com', 'port' => 9000, 'use_ssl' => true, 'use_path_style' => true, // Required for MinIO 'region' => 'us-east-1', // Any value works for MinIO ],],The use_path_style => true is critical. AWS S3 uses subdomain-style URLs by default (bucket.s3.amazonaws.com). MinIO uses path-style (s3.yourdomain.com/bucket). Without this, it won’t connect.
Via Docker Compose environment variables
If you’re using the nextcloud Docker image, set these environment variables instead:
environment: - OBJECTSTORE_S3_HOST=minio.yourdomain.com - OBJECTSTORE_S3_PORT=9000 - OBJECTSTORE_S3_BUCKET=nextcloud-data - OBJECTSTORE_S3_KEY=nextcloud-service - OBJECTSTORE_S3_SECRET=your-service-user-password - OBJECTSTORE_S3_SSL=true - OBJECTSTORE_S3_USEPATH_STYLE=true - OBJECTSTORE_S3_REGION=us-east-1 - OBJECTSTORE_S3_AUTOCREATE=trueExternal storage (adding to existing Nextcloud)
Install the “External storage support” app in Nextcloud Apps. Go to Settings → Administration → External Storage. Add a new mount:
- Folder name: whatever you want users to see
- External storage: Amazon S3
- Bucket:
nextcloud-data - Hostname:
minio.yourdomain.com - Port: 9000
- Region:
us-east-1 - Enable Path Style: yes
- Access key / Secret: your service user credentials
This adds MinIO as a folder inside Nextcloud rather than replacing the primary storage.
Performance Tuning: Chunk Size
For large file uploads, Nextcloud splits files into chunks and uploads them in parallel. The default chunk size is 10MB. For a local MinIO, you can push this higher:
// In config.php'max_chunk_size' => 104857600, // 100MB chunksLarger chunks = fewer API calls = faster uploads for big files. Don’t go crazy with this on slow connections, 10-50MB is the practical range.
If you’re proxying MinIO behind a hostname on a private/local IP, Nextcloud may refuse to connect to it. Allow it via occ:
# In Nextcloud admin settings, or via occphp /var/www/html/occ config:system:set allow_local_remote_servers --value="true"Encryption at Rest in MinIO
MinIO supports server-side encryption. For KMS-managed encryption (SSE-KMS), you’d need HashiCorp Vault or MinIO KES. For simpler setups, SSE-S3 (AES-256, MinIO manages keys):
# Enable default bucket encryptionmc encrypt set sse-s3 myminio/nextcloud-dataWith this enabled, every object stored in the bucket is encrypted at rest. The keys are managed by MinIO. This protects your data if someone walks off with your hard drives but doesn’t add much against an attacker who already has MinIO credentials.
Multi-User MinIO Policies
If you’re running multiple services on the same MinIO instance (Nextcloud, Gitea, Immich, etc.), give each one its own bucket and its own service user with scoped policy. The pattern is the same as above, create a user, create a policy scoped to one bucket, attach policy to user.
Never use MinIO root credentials in application configs. Create service accounts. If one service gets compromised, the blast radius is one bucket.
Backup Strategy for MinIO Data
Your MinIO data lives in the directory you mounted (/data/minio). Back this up like any other critical data:
# Sync MinIO data to a backup target with rclonerclone sync /data/minio /backup/minio-backup --progress
# Or with restic to an offsite targetrestic -r sftp:user@backup-server:/backups/minio backup /data/minio
MinIO also has a built-in replication feature for replicating buckets to another MinIO instance or actual AWS S3, which is cleaner for production:
mc replicate add myminio/nextcloud-data \ --remote-bucket arn:minio:replication::backup-site:nextcloud-data \ --priority 1Scaling Considerations
Single-node MinIO handles most homelab scenarios comfortably. When you need more:
- Erasure coding mode: MinIO with multiple disks distributes data with erasure coding, lose up to half your drives without data loss
- Distributed mode: multiple MinIO instances behind a load balancer
- WORM buckets: for compliance, MinIO supports Object Lock (write once, read many)
For 99% of homelabbers: single node, single drive (or a RAID array behind it), automated backups. That’s enough.
The point isn’t to build AWS in your basement. The point is to have your files stored in a way that’s not tightly coupled to one server’s local filesystem. MinIO gives you that with low overhead and excellent Nextcloud integration.