MinIO Said No. SeaweedFS Said Sure.
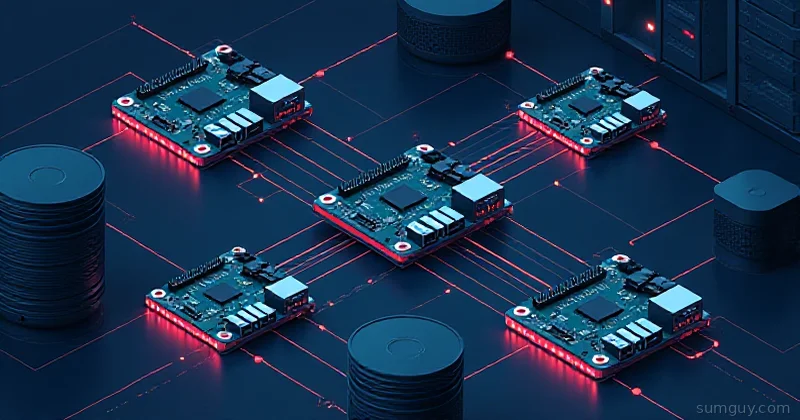
You’ve got three Raspberry Pi 4s sitting on a shelf doing nothing useful. You want distributed object storage with an S3-compatible endpoint. You Google “MinIO Raspberry Pi cluster” and find a forum post from 2022 where someone says it OOM-killed itself after 48 hours.
MinIO is great hardware, but it’s built for x86 servers with real RAM. Its memory baseline sits north of 300 MB per node before you’ve touched a single file. On a Pi 4 with 4 GB shared between your OS, other containers, and whatever else you’ve crammed in there, that math gets ugly fast. And MinIO’s erasure coding in distributed mode wants at least 4 drives in a specific layout, not exactly “I have three Pis and some USB SSDs.”
SeaweedFS is different. It was built to be lean. The master process runs comfortably under 30 MB. Volume servers scale horizontally without demanding symmetric disk layouts. There’s an optional S3 gateway (filer + S3 API layer) that you bolt on when you need it. And unlike Ceph, which is excellent if you enjoy reading 200-page documentation chapters before lunch, SeaweedFS has a setup that a human being can complete in an afternoon.
Let’s build it.
What SeaweedFS Actually Is
SeaweedFS is a distributed file and object storage system written in Go. It’s inspired by Facebook’s Haystack paper (the one that described how they stored billions of photos). The core idea: small metadata, fast blob storage, horizontal scale.
The architecture has three roles:
- Master: tracks cluster topology, assigns volume IDs, handles replication logic. Stateless-ish; you can run multiple masters with Raft consensus. For a home lab, one master is fine.
- Volume servers: store the actual data in “volumes” (large flat files, 30 GB default). Each volume server manages one or more physical disks.
- Filer: optional layer that provides a file-system namespace (think: paths like
/photos/2024/vacation.jpg). Also exposes the S3-compatible API. Uses an embedded LevelDB or external store (Postgres, MySQL, etc.) for the metadata index.
For S3 compatibility you need: master + volume servers + filer + weed s3. That’s the stack we’re building.
Hardware Reality Check
Let’s be honest about what you’re signing up for.
Test cluster for this walkthrough:
- 3× Raspberry Pi 4 (4 GB RAM)
- Each Pi has a 512 GB USB 3.0 SSD attached (USB-to-SATA, not USB drives, matters a lot for sustained writes)
- 1 GbE switch
- Raspberry Pi OS Lite (64-bit, Debian bookworm base)
Honest benchmark numbers vs MinIO single-node on an x86 NUC (i5, 16 GB, NVMe):
| Test | SeaweedFS 3-node Pi cluster | MinIO single-node NUC |
|---|---|---|
| Sequential write (10 MB files) | ~42 MB/s | ~380 MB/s |
| Sequential read | ~55 MB/s | ~420 MB/s |
| Small file write (100 KB, 1000 files) | ~8 MB/s | ~60 MB/s |
| RAM per node (idle) | ~25 to 60 MB | ~310 MB |
The Pi cluster will never win a speed contest against real hardware. The x86 NUC has a faster CPU, faster storage, and faster RAM. What you do get with SeaweedFS on Pis is redundancy, expandability, and the ability to store large cold data cheaply without spending money on a NAS appliance.
Cluster Topology
For this build:
pi-1 — weed master + weed filer + weed s3 (192.168.1.101)pi-2 — weed volume (192.168.1.102)pi-3 — weed volume (192.168.1.103)Pi-1 runs the coordination layer and API. Pi-2 and Pi-3 hold the data. In a production-ier setup you’d run the master on all three nodes with Raft, but for a home lab this is fine. If pi-1 dies, you can’t write, but your data is still safe on the volume servers.
Installation
SeaweedFS ships as a single static binary. Download it on each node:
# Run on each PiWEED_VERSION="3.71"wget -q "https://github.com/seaweedfs/seaweedfs/releases/download/${WEED_VERSION}/linux_arm64.tar.gz" -O /tmp/weed.tar.gztar -xzf /tmp/weed.tar.gz -C /tmpsudo mv /tmp/weed /usr/local/bin/weedsudo chmod +x /usr/local/bin/weedweed versionNo Docker, no compose file, the binary is all you need. We’ll add systemd units to keep everything running.
Starting the Master
On pi-1, start the master:
sudo mkdir -p /data/seaweed/mastersudo weed master \ -mdir=/data/seaweed/master \ -ip=192.168.1.101 \ -port=9333 \ -volumeSizeLimitMB=30000 \ -defaultReplication=001The -defaultReplication=001 flag tells SeaweedFS to keep 2 copies of every file across different nodes. The three-digit code maps to:
XYZ where: X = replicate across datacenters (0 = don't) Y = replicate across racks (0 = don't) Z = replicate across volume servers (1 = 1 extra copy)So 001 means: store the data on one volume server plus one additional copy on a different volume server. If a Pi dies, you still have the data. 000 means no replication, don’t use that unless you’re fine with data loss.
Common replication strategies:
000: single copy, no redundancy (dev/testing only)001: 2 copies on different volume servers (what we’re using)010: 2 copies on different racks100: 2 copies in different data centers
Starting the Volume Servers
On pi-2 and pi-3, after mounting your SSDs to /data/seaweed/volumes:
# pi-2sudo mkdir -p /data/seaweed/volumessudo weed volume \ -mserver=192.168.1.101:9333 \ -ip=192.168.1.102 \ -port=8080 \ -dir=/data/seaweed/volumes \ -max=20# pi-3sudo mkdir -p /data/seaweed/volumessudo weed volume \ -mserver=192.168.1.101:9333 \ -ip=192.168.1.103 \ -port=8080 \ -dir=/data/seaweed/volumes \ -max=20The -max=20 flag limits the volume server to 20 volumes (20 × 30 GB = 600 GB max). Size it to your disk. You can hit the master’s web UI at http://192.168.1.101:9333 to see both volume servers register.
Starting the Filer
The filer provides the namespace layer and the S3 API. Back on pi-1:
sudo mkdir -p /data/seaweed/filersudo weed filer \ -master=192.168.1.101:9333 \ -ip=192.168.1.101 \ -port=8888 \ -defaultReplicaPlacement=001By default the filer uses an embedded LevelDB store for its metadata. That’s fine for most home lab use. If you want to scale the filer or take it more seriously, you can point it at Postgres, but LevelDB will handle millions of files without breaking a sweat.
The filer config lives at /etc/seaweedfs/filer.toml after first run. You can configure the metadata backend there.
Enabling the S3 Gateway
SeaweedFS’s S3 layer sits on top of the filer. Still on pi-1:
sudo weed s3 \ -filer=localhost:8888 \ -ip=192.168.1.101 \ -port=8333That’s it. You now have an S3-compatible endpoint at http://192.168.1.101:8333.
To add authentication, create a config file:
[access_key] [access_key.mykey] accessKey = "myaccesskey" secretKey = "mysupersecretkey" read = true write = true list = true tagging = false admin = falseThen start weed s3 with -config=/etc/seaweedfs/s3.toml. Without a config, the gateway runs in unauthenticated mode, fine for a LAN-only internal service, bad if you’re exposing it.
Systemd Units
You don’t want to SSH in and restart things manually every time a Pi reboots. Here’s a unit for the volume server (repeat for each role with adjusted args):
[Unit]Description=SeaweedFS Volume ServerAfter=network.target
[Service]ExecStart=/usr/local/bin/weed volume \  -mserver=192.168.1.101:9333 \  -ip=192.168.1.102 \  -port=8080 \  -dir=/data/seaweed/volumes \  -max=20Restart=alwaysRestartSec=5User=root
[Install]WantedBy=multi-user.targetsudo systemctl daemon-reloadsudo systemctl enable --now seaweed-volumesudo systemctl status seaweed-volumeCreate similar units for seaweed-master, seaweed-filer, and seaweed-s3 on pi-1. The master must start first, then filer, then s3, use After= and Requires= chaining if you want systemd to handle the ordering.
Testing It With the AWS CLI
Configure a profile pointing at your cluster:
aws configure --profile seaweed# AWS Access Key ID: myaccesskey# AWS Secret Access Key: mysupersecretkey# Default region name: us-east-1# Default output format: jsonThen:
# Create a bucketaws --profile seaweed --endpoint-url http://192.168.1.101:8333 \  s3 mb s3://homelab-backup
# Upload a fileaws --profile seaweed --endpoint-url http://192.168.1.101:8333 \  s3 cp /etc/hosts s3://homelab-backup/hosts.txt
# Listaws --profile seaweed --endpoint-url http://192.168.1.101:8333 \  s3 ls s3://homelab-backup/
# Downloadaws --profile seaweed --endpoint-url http://192.168.1.101:8333 \  s3 cp s3://homelab-backup/hosts.txt /tmp/hosts-restored.txt
If that works, your cluster is healthy. Any S3-compatible tool, Rclone, Restic, MinIO Client, Duplicati, will work with this endpoint.
Replication and What Happens When a Pi Dies
With 001 replication, every file gets stored on two different volume servers. Let’s say pi-2 explodes (metaphorically, Pis rarely actually explode, but you’ll spill coffee eventually).
SeaweedFS will:
- Detect the volume server is gone at the next heartbeat timeout (~15 seconds default)
- Mark affected volumes as degraded
- Continue serving reads from pi-3 (the surviving copy)
- Writes will continue: the master will place new data on available servers
- When you bring pi-2 back, it’ll sync missing data from the surviving volumes
The master’s web UI at :9333 shows volume health. You can also query it:
curl -s http://192.168.1.101:9333/cluster/status | python3 -m json.toolOne thing 001 does NOT protect you from: losing both pi-2 and pi-3 simultaneously, or a corrupted SSD. For that you want 011 (2 extra copies, different racks) or an off-site backup.
Backup Strategy: Because “Distributed” Isn’t “Backed Up”
Replication protects against hardware failure. It does not protect against:
- Accidental deletion (deletes replicate too)
- Ransomware
- You accidentally running
weed volume -max=0 -dir=/data/seaweed/volumesbecause autocomplete betrayed you
For actual backups, Rclone works well:
# Sync your SeaweedFS bucket to a local external drive or another S3 destinationrclone sync \ --s3-access-key-id myaccesskey \ --s3-secret-access-key mysupersecretkey \ --s3-endpoint http://192.168.1.101:8333 \ :s3:homelab-backup \ /mnt/backup-drive/homelab-backup/Or point Restic at it directly:
export AWS_ACCESS_KEY_ID=myaccesskeyexport AWS_SECRET_ACCESS_KEY=mysupersecretkeyexport RESTIC_REPOSITORY=s3:http://192.168.1.101:8333/restic-repoexport RESTIC_PASSWORD=yourrepopassword
restic initrestic backup /home/youruser/important-stuff
Restic with SeaweedFS as the backend is genuinely a nice combo. Restic handles deduplication and encryption; SeaweedFS handles the distributed storage. You get cheap, redundant, encrypted backups on hardware you already own.
For off-site, Rclone to Backblaze B2 or Cloudflare R2 costs almost nothing for cold data, a good companion to keep an extra copy somewhere that isn’t your house.
Docker Compose Alternative
If you’d rather run everything in containers, here’s a compose file for pi-1. Volume servers on pi-2/3 would get their own compose files with just the volume service.
services:  seaweed-master:    image: chrislusf/seaweedfs:latest    command: master -mdir=/data/master -ip=192.168.1.101 -port=9333 -defaultReplication=001    ports:      - "9333:9333"      - "19333:19333"    volumes:      - /data/seaweed/master:/data/master    restart: unless-stopped
  seaweed-filer:    image: chrislusf/seaweedfs:latest    command: filer -master=192.168.1.101:9333 -ip=192.168.1.101 -port=8888    ports:      - "8888:8888"      - "18888:18888"    volumes:      - /data/seaweed/filer:/data/filer    depends_on:      - seaweed-master    restart: unless-stopped
  seaweed-s3:    image: chrislusf/seaweedfs:latest    command: s3 -filer=192.168.1.101:8888 -ip=192.168.1.101 -port=8333    ports:      - "8333:8333"    depends_on:      - seaweed-filer    restart: unless-stopped
The Docker image is multi-arch and includes ARM64 builds. Just pull and run, no cross-compilation needed.
The Bottom Line
SeaweedFS on a Pi cluster is a genuinely fun weekend project, and “fun” is doing some heavy lifting in that sentence. You’ll spend time on networking, systemd unit ordering, and the first time a Pi reboots in the wrong sequence and the filer can’t find the master. These are solvable problems. The documentation is decent, the Go binary is easy to manage, and the community is active.
What it’s good for: cold storage for Restic backups, photo archives, media files for Jellyfin, S3-compatible targets for self-hosted tools like Immich or Nextcloud. Things where you want redundancy across nodes but you’re not melting the drives with constant heavy I/O.
What it’s not good for: databases, anything with sub-millisecond latency requirements, or storing data you’d genuinely be devastated to lose without an off-site backup. A Pi cluster saturates at roughly 1 GbE anyway, you’re not building a storage array for a video production studio here.
If you outgrow it, the same SeaweedFS setup scales to real x86 nodes without changing your tooling or your S3 endpoint URLs. That’s a nice property to have. Your 2 AM self, the one diagnosing why pi-2 lost a drive, will appreciate having started with something this understandable before graduating to Ceph.