Every New Server Is Born Into a Storm
Your server has been online for four minutes. Check the auth log:
journalctl -u ssh -n 50 --no-pager# ortail -50 /var/log/auth.logThere they are. Failed login attempts. Root. Ubuntu. Admin. Test. Pi. Your server just woke up, and the internet’s automated scanners are already knocking. Port 22 is the most scanned port on the internet. If you’re running SSH with default settings and password authentication enabled, it’s only a matter of time before something gets through.
The good news: properly configured SSH is genuinely hard to break. The bad news: the defaults are set for accessibility, not security. We’ll go through the full progression, from disabling the dumbest defaults to SSH certificate authentication, 2FA, and jump host configuration.
One rule above all: make a second SSH connection to verify your changes work before closing your existing session. Every recommendation in this guide, if applied incorrectly, can lock you out. Keep a backup connection open until you’ve confirmed the new config works.
The Default sshd_config Is a Liability
The SSH daemon configuration lives at /etc/ssh/sshd_config. On a fresh Ubuntu or Debian install, several defaults are doing you no favors.
# Check your current settingssshd -T | grep -E 'passwordauth|permitroot|port|maxauthtries'Common dangerous defaults:
PasswordAuthentication yes: brute-forceablePermitRootLogin yes(sometimes): attackers always try rootPort 22: every scanner knows where to look- No
AllowUsersrestriction: any valid user can SSH in
Essential sshd_config Changes
Edit /etc/ssh/sshd_config (or create a drop-in at /etc/ssh/sshd_config.d/99-hardening.conf on newer systems, preferred, won’t get overwritten by package updates):
# Disable password authentication entirely (use keys only)PasswordAuthentication noChallengeResponseAuthentication noKbdInteractiveAuthentication no
# Don't allow root loginPermitRootLogin no
# Only specific users can SSH inAllowUsers yourusername ansible_user
# Limit auth attempts before disconnectMaxAuthTries 3
# Maximum concurrent unauthenticated connectionsMaxStartups 10:30:100
# Disconnect idle sessions after 5 minutesClientAliveInterval 300ClientAliveCountMax 2
# Don't show /etc/motd (optional, but less info leakage)PrintMotd no
# Disable X11 forwarding unless you need itX11Forwarding no
# Disable TCP forwarding unless you need itAllowTcpForwarding no
# Only allow sftp for specific users if needed# Match User sftponly#   ForceCommand internal-sftp#   ChrootDirectory /home/%u
After editing:
# Validate the config before reloadingsshd -t
# If no errors, reloadsystemctl reload ssh
# KEEP YOUR CURRENT SESSION OPEN. Open a new terminal and test:ssh -v yourusername@yourserver
Moving to Ed25519 Keys
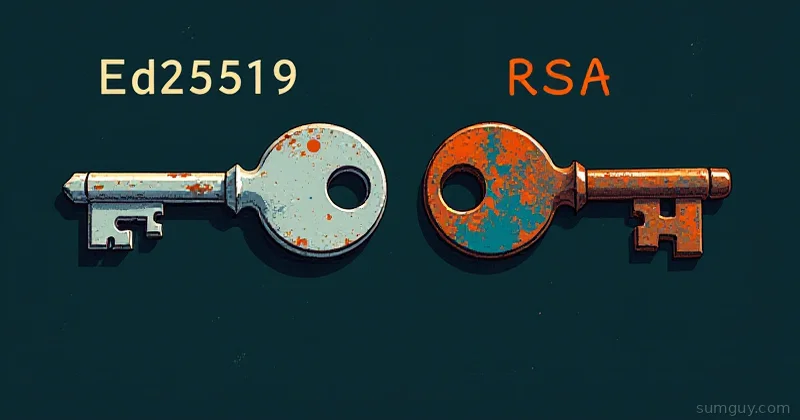
RSA 2048-bit keys were fine in 2010. Today, Ed25519 is the right choice: smaller keys, faster operations, and better security properties based on elliptic curve cryptography.
Generating an Ed25519 Key Pair
# On your LOCAL machinessh-keygen -t ed25519 -C "your@email.com" -f ~/.ssh/id_ed25519
# With a memorable name for specific serversssh-keygen -t ed25519 -C "homelab-2026" -f ~/.ssh/id_homelab
Always set a passphrase. Your key is protected by the passphrase when stored on disk. Use ssh-agent to avoid typing it constantly:
# Add key to agentssh-add ~/.ssh/id_ed25519
# Check agent keysssh-add -l
Deploying Your Public Key
# Copy public key to serverssh-copy-id -i ~/.ssh/id_ed25519.pub yourusername@yourserver
# Or manually:cat ~/.ssh/id_ed25519.pub# Paste into ~/.ssh/authorized_keys on the server# Verify permissions (SSH is strict about these)chmod 700 ~/.sshchmod 600 ~/.ssh/authorized_keysSSH Certificates: The Team-Friendly Upgrade
Individual key pairs work fine for one person with a handful of servers. They don’t scale. When you have:
- Multiple users accessing multiple servers
- Need to provision and revoke access
- Can’t update
authorized_keyson 40 servers when someone leaves
SSH certificates are the answer. Unlike regular SSH keys (where the server needs your public key in authorized_keys), certificates are signed by a CA. You configure your servers to trust the CA, and any certificate signed by that CA is accepted.
Setting Up SSH CA with step-ca
Using step-ca (see the mTLS article for setup):
# Configure SSH certificate issuance in step-ca# This is enabled by default in step-ca's SSH provisioner
# Issue an SSH certificate for a userstep ssh certificate user@example.com id_ecdsa \  --ca-url https://step-ca.internal:9000
# This creates id_ecdsa (private key) and id_ecdsa-cert.pub (certificate)
Configuring sshd to Trust Your CA
# Get your SSH CA public key from step-castep ssh config --roots > /etc/ssh/ca.pub
# Add to sshd_config:TrustedUserCAKeys /etc/ssh/ca.pub
Now any user with a certificate signed by your CA can log in, without needing their public key in authorized_keys. To revoke access, you stop signing certificates for that user, or use step-ca’s revocation features.
Host Certificates (Eliminating “Unknown Host” Warnings)
The flip side: SSH servers can also have certificates, so clients don’t see “The authenticity of host ‘X’ can’t be established.” Your servers get a certificate from your SSH CA, and clients trust your CA.
# Sign a host key with your CAstep ssh certificate --host hostname /etc/ssh/ssh_host_ecdsa_key.pub \  --ca-url https://step-ca.internal:9000
# In sshd_config:# HostCertificate /etc/ssh/ssh_host_ecdsa_key-cert.pub
# On client machines, trust the CA for known hostsstep ssh config --host --roots >> ~/.ssh/known_hosts
2FA with Google Authenticator PAM
Want a second factor on top of your key? The PAM (Pluggable Authentication Module) approach adds TOTP (time-based one-time passwords, the six-digit codes from apps like Google Authenticator or Bitwarden).
# Install the PAM moduleapt install libpam-google-authenticator
# Run as the user who will SSHgoogle-authenticator# Answer 'y' to time-based tokens# Scan the QR code with your authenticator app# Save the backup codes somewhere safe# Add near the top:auth required pam_google_authenticator.so# These settings enable PAM challenge + key auth:KbdInteractiveAuthentication yesAuthenticationMethods publickey,keyboard-interactiveUsePAM yesWith this config, SSH requires: your key AND the TOTP code. Even if someone gets your private key, they still need your phone.
Note: if you add 2FA, make sure you test it before closing your session. It’s the easiest thing to misconfigure.
ProxyJump: Bastion Hosts the Clean Way
In any multi-server setup, exposing SSH on every server to the internet is unnecessary. The better approach: one bastion/jump host with SSH exposed, everything else reachable only through it.
Old way (ProxyCommand, verbose):
ssh -o ProxyCommand="ssh -W %h:%p bastion.example.com" internal-serverNew way (ProxyJump, clean):
ssh -J bastion.example.com internal-serverIn ~/.ssh/config:
Host bastion    HostName bastion.example.com    User admin    IdentityFile ~/.ssh/id_homelab    Port 22
Host internal-*    ProxyJump bastion    User admin    IdentityFile ~/.ssh/id_homelab
Host internal-db    HostName 192.168.10.50
Host internal-nas    HostName 192.168.10.60
Now ssh internal-db automatically jumps through the bastion. No extra commands, no extra thinking.
For multi-hop (bastion → internal → deep-internal):
Host deep-internal HostName 10.0.0.5 ProxyJump bastion,internal-serverfail2ban for SSH
Even with key-only authentication, you want fail2ban watching your SSH logs. Attackers hammering your port with invalid usernames is noisy and generates log pollution, and some configurations still allow authentication attempts that generate noise.
apt install fail2ban
[sshd]enabled = trueport = sshfilter = sshdlogpath = %(sshd_log)sbackend = %(sshd_backend)smaxretry = 3bantime = 24hfindtime = 10msystemctl enable fail2bansystemctl start fail2ban
# Verify it's watchingfail2ban-client status sshdChanging the SSH Port
Moving SSH off port 22 doesn’t improve security meaningfully, scanners probe all ports eventually. But it does reduce log noise, which makes it easier to spot real issues.
Port 2222# Open the new port first, before changing sshdufw allow 2222/tcp
# Reload SSHsystemctl reload ssh
# Test from new terminalssh -p 2222 yourusername@yourserver
# Once confirmed working, close port 22ufw delete allow 22/tcpUpdate your ~/.ssh/config:
Host myserver HostName your.server.ip Port 2222 User yourusername IdentityFile ~/.ssh/id_ed25519The Hardened SSH Checklist
| Setting | Secure Value | Why |
|---|---|---|
| PasswordAuthentication | no | Keys only |
| PermitRootLogin | no | Never SSH as root |
| AllowUsers | specific users | Whitelist |
| MaxAuthTries | 3 | Limit brute force |
| X11Forwarding | no | Attack surface |
| Key type | Ed25519 | Best current standard |
| 2FA | PAM TOTP | Second factor |
| Port | Non-22 | Reduce noise |
| fail2ban | Enabled | Dynamic banning |
| SSH certs | step-ca | Scale access management |
The irony of SSH hardening is that most of the work is done once and then it just runs. Five hours of setup gives you years of not worrying about it. The alternative is checking your auth logs every morning and feeling vaguely sick.